Monthly Archives: March 2011

Thom Van Vleck’s “Get a Grip” Tips

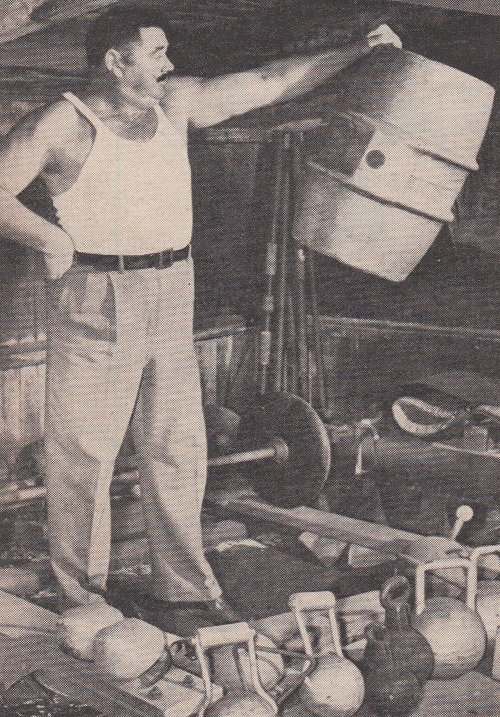
While Mac Batchelor had huge hands, he also developed them with many different implements and techniques.

by Thom Van Vleck

This is my entry in the DB Walk 3.5″ handle contest!  I like my odds better this time with so many winners.  But honestly, me writing about grip training is a bit like a fat guy telling you how to diet!

A great grip has eluded me in my 34 year lifting career.  Sure, there are things that I do better than others, like the pinch grip.  I have also never lost a deadlift in a contest due to grip.  But the reality is that I have small hands for my size and a strong grip never came naturally to me.  So maybe you could consider me the “hardgainer” when it comes to grip and maybe that makes me more of an expert than I thought.  After all, they say mediocre players make the best coaches.  The best athletes generally don’t make good coaches because everything came naturally to them.

As a result, I’ve read a great deal about grip training.  I would recommend  any of John Brookfield’s books on grip training.  I have also got to train with two of the best short steel benders in the world, John O’Brien and Brett Kerby.  So, most of this comes from those experiences but I will end with one tip that I came up with on my own, so hopefully you will get at least one original idea out of this!

1. Specify

Over the years my focus has changed in the strength world.  I have competed in Olympic lifting, Powerlifting, Strongman, USAWA All-round, and my passion for the last 15 years has been Scottish Highland Games.  All require grip strength and lots of different types of grip strength.   If you are going to do a  bench press meet you don’t just work Behind the Neck Presses, you work the Bench Press and all the muscles specific to that event!  Don’t just throw in some wrist curls at the end of your workout.  Train your grip specifically for how you are going to need it.   This doesn’t mean you find one grip exercise and work it to death.  You need to get some books, read some articles, talk to some good grip guys and get a list going  and keep track of what you think works for you.   If you came to my gym I could show you over 100 grip exercises to do and all of them I have done myself at one time or another.    In the process, I have figured out what works for me and for the specific event I need it for!

2.  Training

Try to quantify your workouts as much as possible so you can be progressive.  Don’t just take a weight and do it every workout, it’s PROGRESSIVE resistance that’s key.  Keep some magnets around to add fractions of pounds.  Get some fractional plates or the “poor boy” method is go to the tractor supply and get some large washers that will fit on a 1″ bar, two of them will weigh from 1/4 to 1/5 of a pound.  Get enough to supplement your 2 and 1/2lb plates and if you can, get some 1 1/4lb plates.  You need to be able to add fractions of weight to any implement and push yourself.  Plan your workout, set goals, cycle your grip training just like you would for any contest, including giving it a break from time to time.

3.  Mental Aspect of Grip

I think Grip training is more mental than most any other kind of training.  I have watched John O’Brien and Brett Kerby grimace in pain doing the short steel bending and having folded a 60 penny nail a few times….it just hurts!  Your hands are full of nerves and that is why.  Sure, Squats are hard, but your hands will hurt!  So, there’s a mental aspect to this that needs to be overcome.  I saw John O’Brien drive a 60 penny nail deep in his hand and he still finished the bend and did three more shows that same weekend.   Most grip guys have mastered pain.  Working you grip requires pain tolerance and can also teach it!  Brett told me that his hands have hurt so bad he thought he’d seriously injured them.  It’ll hurt….get over it.

4.  Just One Original Thought

Ok, let’s see if I can impress you.  Most of what any of us knows about anything we learned from someone else.  Here is something I came up with on my own (but that doesn’t mean someone else didn’t come up with it first).  I noticed that when I trained my grip, everything involved my elbow being bent.  I also noticed that most everything that I needed a great grip for involved my elbow being locked out (throwing, deadlifting, cleaning, etc.).  So, I spend a lot of time working my grip keeping my elbow locked out.  This usually involves hanging from a bar and squeezing the bar for reps (hanging from a bar has the added benefit of tractioning your back).  It also means that whatever grip exercise I’m doing, I try and get myself in that “lockout” position and if possible, with my arm being stretched to get used to gripping as hard as possible with my arm straight and under tension.

So, those are my grip tips.   I hope you have gained some knowledge that will help you “get a grip” on your next contest!

Clubbells

by Jarrod Fobes

Karena Fobes demonstrating the use of Clubbells and the exercise Curls with Extensions.

My grip got a lot stronger from training my shoulders. Last year after multiple back injuries, a couple of rotator cuff tears, and even tearing the cartilage between my ribs (twice!) I was becoming very interested in exploring different ways to train. That’s when I discovered clubbells.

For those that don’t know, clubbells originated in India and have been in use for thousands of years. They enjoyed tremendous popularity in the west during the Victorian era, but fell out of favor with the advent of modern weightlifting. In recent years, renowned coaches such as Scott Sonnon and Louie Simmons have done much to bring club swinging back into physical training. They are steadily growing in popularity with martial artists and other oddballs.

Being the thrifty sort, my clubs are made out of PVC filled with cement mix. I put together a simple circuit of shoulder exercises consisting of front circles, windmills, and curls with extension and got to work on building up my shoulders.

The particular exercises are best learned via video or in person, but a brief description is as follows. All exercises begin with the clubs hanging at your sides.

FRONT CIRCLES: Draw circles in the air in front of you with the clubs. Your right hand will move clockwise from your perspective, and your left will move counter-clockwise.

WINDMILLS: You are still describing circles, but the angle has changed. Your right hand will start lifting in front of your left hip. As it rises, it will move back to the right side and fall behind you. The motions should be similar to doing a backstroke.

CURLS WITH EXTENSIONS: This exercise is as much to give your shoulders a slight rest as it is to work the rest of your arms. Perform an explosive curl that ends with your elbows pointed up and the clubs lying against your back, points down. From here extend your arms and fully tighten your triceps. Lower your clubs to the starting position. If you want, you can also combine this exercise with a squat to warm up your legs as well.

I did this circuit about every other day, doing the circuit for two rounds at first. After successfully completing two consecutive circuits for two workouts in a row, I would add another round, eventually working up to six rounds. When you can consistently perform six rounds of this circuit, it’s time to build heavier clubs.

The first thing I noticed was a dull ache in my hands and forearms, even before my shoulders began to fatigue. The clubs were just plain hard to hold on to, so I decided to come up with a little forearm circuit as well to conclude my clubbell sessions with. This consists of front wrist lifts, rear wrist lifts, and finger crawls.

FRONT WRIST LIFTS: Keep your arms as straight as possible, and lift the clubs to at least parallel to the floor using only your wrists.

REAR WRIST LIFTS: These are the same as front wrist lifts, except you hold the clubs in a reverse grip. Your wrist has a greater range of motion working this way, so try to whack yourself in the triceps with the clubs on each rep. Make sure your arm is straight though this will isolate your forearms more.

FINGER CRAWLS: You know how when you get really fatigued even the most simple task can seem difficult? Welcome to finger crawls. Let the clubs hang at your sides, and walk your fingers up the club until you reach the tip. Keep the club perpendicular to the floor until you reach the tip, then let the club flip over and crawl back to the handle. Repeat this circuit until one of the exercises fails. Most likely, it will be the finger crawl that you bonk out on.

After about six weeks on these two circuits, I had added noticeable mass to each of my hands. Even better, I went from being able to do 15 consecutive reps on my Captain of Crush trainer gripper, to 26 consecutive reps. My grip is as strong as it’s ever been, and what’s better is that my shoulders have never been stronger or more stable. No USAWA lifts incorporate clubbells, but consider adding them to your routine to bump your hand strength up to the next level.

A Subtle Way to Train Your Grip

by Mark Haydock

Mark Haydock demonstrates a three-finger bar grip.

From my early days of training I have always applied this approach to the way I grip and load the bar, as you read on I am sure you will agree it is a subtle way to train your grip.

There are two sections to this approach, the first is simply the way the bar is gripped, the second part is loading the bar.

Gripping the bar

The idea behind this approach to grip work is to train your grip all the time, even when it is not a grip session! I will use the deadlift as the example exercise, however, the same approach can be applied to most floor pulls, lat pulldowns/rows, shrugs, etc.

Most of the grip work is actually done with your warm up and lighter poundages. The first set of deadlifts may be with an empty bar, simply grip the the bar with your index finger, the second set use index and fore fingers, next set is three fingers, next set is all four fingers – with an open hand, the bar is almost resting on your finger tips, you may be able to maintain this grip for a couple more warm up sets, depending how strong your grip is. Once you hit a poundage that you cannot hold just adjust to your normal hook or reverse grip. Over time try to tweak your warm up poundages a little, as you would with your heavy singles or 1 rep max.

Using a finger tip grip to load plates adds grip training to every workout.

Loading the bar

The subtle element here is to only use I hand to pick up the weight plates when you are loading the bar for your training. Use your right hand when loading the right side of the bar and your left hand when loading the left side of the bar. Rather than use a deadlift loading lever to lift the bar use your fee hand to lift the end of the bar, grip the bar just inside the collar. Depending how good your grip is you can use a 1, 2, 3, or 4 fingers to grip the bar, the same applies to loading the weight plate.

The one handed approach to loading the weight plate also includes carrying the weight from the storage tree to the bar! Don’t cheat by using two hands or rolling the plate. With the lighter plates, 1.25kg,2.5kg, 5kg try using 1 finger and 1 thumb, as you use heavier weights, 10kg, 15kg, 20kg, 25kg and even 50kg you may need to use 2 or 3 fingers and a thumb. If you are loading a 25kg plate and you simply can’t carry it one handed try a two handed pinch grip, it all helps!

The key thing to remember with this approach is that it is a long term project, massive grip strength doesn’t come over night. However, once you have a good grip it stays with you for the long run.

As a final testimony to my grip technique I can honestly say I have never missed a deadlift or clean due to poor grip, touch wood I have never had any real problems with my grip!

My Pinch Grip Training

by Scott Schmidt

Greetings, Fellow Strongmen!

Scott Schmidt shows his AMAZING Pinch Grip - with a 2 Hand Pinch Grip of 180 pounds and a 1 Hand Pinch Grip of 115 pounds.

After a recent performance at the Historic Ambridge Bar Bell Club Challenge, I was asked to submit an article describing my training techniques for the Pinch Grip Lift.

It is my pleasure to share these methods with anyone who is looking to improve their grip oriented lifting events. I will offer the recommended exercises I have used to improve my gripping strength. I have not “specialized” only in working on my grip. I do my grip exercises in between the heavy lift workouts of squats, pulls, overhead supports etc. I focus on grip movements in order to insure I do not have a weak link while doing the pulling in the Olympic Style quick lifts.

That said, among the best grip training exercises are the results you gain from doing the snatch grip dead lift. Since it is an awkward position, it forces your grip to respond. You know your limit easily when the bar doesn’t finish to the top of the thighs. You also are activating other groups of pulling muscles while doing the snatch grip dead lift. This is a bonus because to pick up modest weight for hand strength only will not enable you to progress as fast. And, since the “grip only” muscles can be used up quickly, i.e. hands, fingers, and forearms, by doing an exercise which involves other muscles, you are not as likely to over train your “grip only” muscles.

In addition to doing 3 sets of 3 reps in the snatch grip dead lift 80% of max single, which of course can produce strength gains in many areas, here are some other exercises I do to improve my results when targeting a record in a “grip only” lift:

Lift Sets Reps % of Max
2 Inch Vertical Bar Deadlift 3 3 75
2 Hand Pinch Grip 4 2 80
1 Hand Pinch Grip 6 1 90
Bent Over Row 5 5 60

In summary, these 5 exercises have been very useful to me in order to achieve grip lift record results. Another movement you can do to help you set targets for improvement is to lift something awkward with one hand at a time. For instance, I get Spring Water delivered to my front door in 5 gallon jugs. I then have to take them to my gym area. To test myself, I have used the full bottles to see how long I can hold them from the neck. Or, how long I can walk with one in each hand. Just an idea to have fun improving your grip and break up the “iron only” exercises.

Hope this article helps you get rid of any “bottle cap twist-off” issues.

My Extreme Wrist Roller

by Al Myers

Al Myers finishing a set with 200 pounds on his Extreme Wrist Roller.

I am going to start off this week of stories on grip training by describing one of MY favorite grip exercises!   Don’t worry – I am NOT one of the winning stories as technically I’m not eligible since I’m the one running the contest!  I just want to share an exercise that is the backbone of my grip training.

The Wrist Roller has been around for years.  Everyone has one and everyone has done this exercise at some point in their training history.  Fifty years ago wrist rollers were practically the only grip exercise trained, and where included as part of “packages” in weightlifting equipment sales.  York Barbell would sell equipment packages (back in the 50’s) like this – a 220# set of weights with a bar, a neck harness, a pair of Iron Boots, and a WRIST ROLLER.  It was an important training implement back then, and still is – it’s just most lifters have forgot about it.  I have used several wrist rollers through the years – from a rope on a dowel rod to now what I call My Extreme Wrist Roller.   I am not a grip specialist, but I really enjoy the training exercises for grip.  I do a little grip training every week.  I don’t specialize on any specific type of grip strength – I try to do a little of everything.  Some areas of grip strength I’m stronger at than other areas.  I have a good squeeze grip, an average round bar grip, and not the best pinch grip.  It is interesting how different lifters will have different areas of  grip strengths.

The one thing I really enjoy about the Wrist Roller is that it works not just the grip, but the forearm muscles as well.  Too many grip exercises are, what I call, “hand dependent”.  This means the “lifting capacity” of these grip exercises are more about the size of the hand or the contact area of the fingers.  Bigger hands and longer fingers – more surface adhesion.  Growing bigger hands is not exactly something you can do.  You are pretty much stuck with what you have.  That is why I like forearm training better.  You can ALWAYS increase the size of your forearm muscles or strength of your forearm muscles.  How many “hand dependent” grip exercises do you train that feel easy up to your max, and then you add 5 pounds, and it becomes impossible?  I can think of several – exercises like the Rolling Thunder and any Pinch Grip exercise.   These type of exercises go for me like this – easy, easy, easy, impossible.   And trying a little harder doesn’t help!!  It is still impossible.    The Wrist Roller is not like that.   You can push yourself as hard as you would like.  Sometimes I think I will NEVER get the loaded vertical bar to touch the bottom of the Wrist Roller (which I consider the finish of an attempt), but I keep after it till my forearms are SCREAMING WITH PAIN!  You can accomplish any lift with a Wrist Roller if you want to try hard enough!  That’s my kind of lift.

After a few sets with this Extreme Wrist Roller, your forearm will be PUMPED!

I like to do progressive loads with my Extreme Wrist Roller.  I will usually start with a couple 45’s and then add weight as I add sets.  I try to do 4-5 sets total in about 15 minutes.  As I said, I’m not a grip specialist and usually do my grip training at the end of a regular workout.   I only “train grip” with the time I have left over.   But I’ll tell ya – 15 minutes on my Extreme Wrist Roller and you will know it!  Your forearms will be “blood engorged” and cramping from the exertion.  At times I can hardly close my hands when I’m done.   I made this Extreme Wrist Roller several years ago.  I was getting tired of those silly “rope on a stick” wrist rollers because I felt my shoulders were limiting me in how much I could wrist roll, because of the way you had to hold your arms out in front of you during the exercise.  With my Extreme Wrist Roller, the wrist roller is supported by the cage and it takes all of the shoulders out of it, and places all of the stress of the exercise where you want it – on your forearms.  The roller has a two inch knurled handle.  Your grip will not fail before your forearm muscles give out.   A side benefit is that the knurled handle will shave off all of your hand calluses by the time you are finished.  After you get the VB to the top – the exercise is not over.  You then need to lower it under control.  Sometimes this seems like the hardest part.

Now I hope you won’t forget about wrist roller training.

1 2 3 4 6