Tag Archives: Grip Training

All-ROUND Grip Strength

by John McKean

Rob McKean showing total body work (and enjoyment!) from squeezing the life out of dear old Dad!

My neighbor once shouldered a 604 pound wrestler and body-slammed him.  A gym full of iron game devotees also witnessed him doing a strict bench press of 330 pounds for 38 consecutive reps – no wraps, no suit, no drugs! Except for a busy work schedule, my old buddy would have challenged Paul Anderson for a berth on the ’56 Olympic weightlifting team.   Art Montini knew him as a fellow “Odd-lift” competitor (curl, bench press, press-behind-neck, squat, deadlift – like a version of All-Rounds, before official powerlifting!). You may know him as Bruno Sammartino! Yes, THAT Bruno – pro wrestling’s “Living Legend,” the athlete responsible for selling more tickets than any wrestler in history!

Before breaking in to the pro ranks, Bruno set all Pittsburgh heavyweight lifting records and even won a physique contest or two. During very intense workouts, however, his most unusual exercise, always thinking toward wrestling, was to grip a long, heavy boxing bag and squeeze for all he was worth. We would call this a “bear hug,” and the young lion eventually acquired the power to EXPLODE these rugged combinations of thick canvas and sand! In his first crack at the heavyweight wrestling title (in what was later revealed to be much more of a serious grudge match than “entertainment”), Bruno applied his very brutal gripping hold onto longtime champion Buddy Rogers, acquiring a submission within 47 seconds of the match!

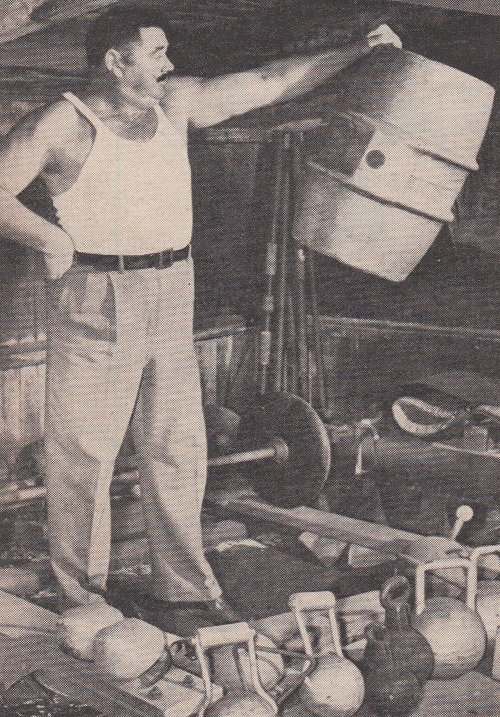
The total body Iso-Hug on a sparring mannequin, for all-round grip strength

Naturally, we young teens were anxious to emulate our hero’s training procedures. I found the heavy bag squeeze to be superb grip strength training, not only pumping the forearms, but also going full circle to yield arm, delt, and pec strength. Heck, the hips, legs, and back were intensely involved too – truly an all-round gripping exercise!! Since the material always “gave” a bit when hugged with intent, what started as an “isometric exercise” of sorts ended up more as a short range type movement, as in subsequent power rack lifts.

The old sand bags are still around, but few of our weightlifting gyms have them. I suppose you could sneak up and try this on a lifting partner – though I did this once with Art, and he BIT me (of course, I found out the hard way that Art was actually an undefeated collegiant wrestler in his early years!). These days, however, there are lifelike mannequins that provide a realistic type body gripping (see photos) and supply a rugged “moving isometric” form of work. Or you could build a bag – fill it with stones, sand, or straw.

John exploding the top of a small sparring bag with his killer headlock !

One old time wrestler, Ed “Strangler” Lewis, a generation before Bruno, built himself a special skull sized bag to religiously train his deadly headlock. It was said no other wrestler, back in the 1920s when the professional sport was entirely legitimate, could ever defeat him. In fact, his crushing arm grip was so intense that even willing sparring partners were hard for ole Ed to come by! I can personally attest to the gripping STAMINA that a headlock squeeze will yield; if one holds on, giving his all, for a minute or more to a small bag, then the forearms and biceps feel swollen to Mr. Universe proportions!

WE in the USAWA pride ourselves on lifts that work the total body! Throw away those wimpy little hand grippers or soft tennis balls, and grab onto something that’ll cause all-round crunching effort!

Ring and Pinky Thick Bar Deadlift & Farmer’s Drag

by Ben Edwards

Ben Edwards demonstrates the Ring and Pinky Fingers Thick Bar Deadlift and Farmer's Drag.

The ring and pinky fingers are the weak link when training with thick bars. This article introduces the reader to specialized training designed to improve the support grip strength of the ring and pinky fingers. I call this combo exercise “Ring and Pinky Thick Bar Deadlift and Farmer’s Drag.”

This is the hand placement for this grip.

The equipment needed is minimal. An Olympic barbell and about 200 pounds of weight plates will provide adequate resistance options for everyone from a raw beginner to an advanced strength athlete.

I borrow the name for this exercise from Farmer’s Walks – where an athlete walks while holding a weight in each hand.

A Ring and Pinky Thick Bar Deadlift and Farmer’s Drag is performed by grasping one end of an Olympic barbell – at the end of the loading sleeve – using only the ring finger, pinky finger, and thumb. Then you simply deadlift the barbell and then you have the option of dragging one end of the barbell while you walk with the end you’re gripping elevated.

To minimize damage to one end of the barbell it’s best to drag the bar on grass or dirt – if you choose to do the Farmer’s Drag – instead of the Farmer’s Deadlift.

As with the Farmer’s Walk, there are two basic methods of increasing the difficulty of the exercise.

1. Add more weight to the bar. The weight is added to the same loading sleeve that you are gripping with your ring finger, pinky finger, and thumb. That way the weight plates won’t dig a wide furrow in your yard if you’re doing the Farmer’s Drag.

  • If you’re worried about the bar damaging your grassy training area you can secure the end of the bar that you’re not gripping into a single roller skate – duct tape comes in handy – and perform the Farmer’s Drag in your garage, on the street, or on a running track. All without fear of damaging the bar or the training surface.
  • The roller skate tip also works well for a trainee that isn’t strong enough yet to drag the empty barbell using their ring finger, pinky finger, and thumb strength.

2. Drag for longer distance if you’re doing the Farmer’s Drag.

  • Or hold for a longer period of time if you’re doing the Ring and Pinky Thick Bar Deadlift.

TAILORING A WORKOUT TO YOUR GOALS

For Maximum Strength – Heavy Loads and Short Holds.

  • Holds should be kept in the 5-second to 10-second range if maximum strength is your goal.
  • This holds true whether you’re doing the Farmer’s Drag or the Farmer’s Deadlift.
  • The Farmer’s Drag will simply be done for very short distances and the Farmer’s Deadlift will be done for low reps – anywhere from 1 to 3 reps.

For Strength-Endurance – Moderate Loads and Long Holds.

  • Holds can be much longer than when your goal is maximum strength. 30 seconds to 60 seconds is a common approach to strength-endurance training.
  • The Farmer’s Deadlift will be done for higher reps – anywhere from 8 to 20.

Thom Van Vleck’s “Get a Grip” Tips

While Mac Batchelor had huge hands, he also developed them with many different implements and techniques.

by Thom Van Vleck

This is my entry in the DB Walk 3.5″ handle contest!  I like my odds better this time with so many winners.  But honestly, me writing about grip training is a bit like a fat guy telling you how to diet!

A great grip has eluded me in my 34 year lifting career.  Sure, there are things that I do better than others, like the pinch grip.  I have also never lost a deadlift in a contest due to grip.  But the reality is that I have small hands for my size and a strong grip never came naturally to me.  So maybe you could consider me the “hardgainer” when it comes to grip and maybe that makes me more of an expert than I thought.  After all, they say mediocre players make the best coaches.  The best athletes generally don’t make good coaches because everything came naturally to them.

As a result, I’ve read a great deal about grip training.  I would recommend  any of John Brookfield’s books on grip training.  I have also got to train with two of the best short steel benders in the world, John O’Brien and Brett Kerby.  So, most of this comes from those experiences but I will end with one tip that I came up with on my own, so hopefully you will get at least one original idea out of this!

1. Specify

Over the years my focus has changed in the strength world.  I have competed in Olympic lifting, Powerlifting, Strongman, USAWA All-round, and my passion for the last 15 years has been Scottish Highland Games.  All require grip strength and lots of different types of grip strength.   If you are going to do a  bench press meet you don’t just work Behind the Neck Presses, you work the Bench Press and all the muscles specific to that event!  Don’t just throw in some wrist curls at the end of your workout.  Train your grip specifically for how you are going to need it.   This doesn’t mean you find one grip exercise and work it to death.  You need to get some books, read some articles, talk to some good grip guys and get a list going  and keep track of what you think works for you.   If you came to my gym I could show you over 100 grip exercises to do and all of them I have done myself at one time or another.    In the process, I have figured out what works for me and for the specific event I need it for!

2.  Training

Try to quantify your workouts as much as possible so you can be progressive.  Don’t just take a weight and do it every workout, it’s PROGRESSIVE resistance that’s key.  Keep some magnets around to add fractions of pounds.  Get some fractional plates or the “poor boy” method is go to the tractor supply and get some large washers that will fit on a 1″ bar, two of them will weigh from 1/4 to 1/5 of a pound.  Get enough to supplement your 2 and 1/2lb plates and if you can, get some 1 1/4lb plates.  You need to be able to add fractions of weight to any implement and push yourself.  Plan your workout, set goals, cycle your grip training just like you would for any contest, including giving it a break from time to time.

3.  Mental Aspect of Grip

I think Grip training is more mental than most any other kind of training.  I have watched John O’Brien and Brett Kerby grimace in pain doing the short steel bending and having folded a 60 penny nail a few times….it just hurts!  Your hands are full of nerves and that is why.  Sure, Squats are hard, but your hands will hurt!  So, there’s a mental aspect to this that needs to be overcome.  I saw John O’Brien drive a 60 penny nail deep in his hand and he still finished the bend and did three more shows that same weekend.   Most grip guys have mastered pain.  Working you grip requires pain tolerance and can also teach it!  Brett told me that his hands have hurt so bad he thought he’d seriously injured them.  It’ll hurt….get over it.

4.  Just One Original Thought

Ok, let’s see if I can impress you.  Most of what any of us knows about anything we learned from someone else.  Here is something I came up with on my own (but that doesn’t mean someone else didn’t come up with it first).  I noticed that when I trained my grip, everything involved my elbow being bent.  I also noticed that most everything that I needed a great grip for involved my elbow being locked out (throwing, deadlifting, cleaning, etc.).  So, I spend a lot of time working my grip keeping my elbow locked out.  This usually involves hanging from a bar and squeezing the bar for reps (hanging from a bar has the added benefit of tractioning your back).  It also means that whatever grip exercise I’m doing, I try and get myself in that “lockout” position and if possible, with my arm being stretched to get used to gripping as hard as possible with my arm straight and under tension.

So, those are my grip tips.   I hope you have gained some knowledge that will help you “get a grip” on your next contest!

Clubbells

by Jarrod Fobes

Karena Fobes demonstrating the use of Clubbells and the exercise Curls with Extensions.

My grip got a lot stronger from training my shoulders. Last year after multiple back injuries, a couple of rotator cuff tears, and even tearing the cartilage between my ribs (twice!) I was becoming very interested in exploring different ways to train. That’s when I discovered clubbells.

For those that don’t know, clubbells originated in India and have been in use for thousands of years. They enjoyed tremendous popularity in the west during the Victorian era, but fell out of favor with the advent of modern weightlifting. In recent years, renowned coaches such as Scott Sonnon and Louie Simmons have done much to bring club swinging back into physical training. They are steadily growing in popularity with martial artists and other oddballs.

Being the thrifty sort, my clubs are made out of PVC filled with cement mix. I put together a simple circuit of shoulder exercises consisting of front circles, windmills, and curls with extension and got to work on building up my shoulders.

The particular exercises are best learned via video or in person, but a brief description is as follows. All exercises begin with the clubs hanging at your sides.

FRONT CIRCLES: Draw circles in the air in front of you with the clubs. Your right hand will move clockwise from your perspective, and your left will move counter-clockwise.

WINDMILLS: You are still describing circles, but the angle has changed. Your right hand will start lifting in front of your left hip. As it rises, it will move back to the right side and fall behind you. The motions should be similar to doing a backstroke.

CURLS WITH EXTENSIONS: This exercise is as much to give your shoulders a slight rest as it is to work the rest of your arms. Perform an explosive curl that ends with your elbows pointed up and the clubs lying against your back, points down. From here extend your arms and fully tighten your triceps. Lower your clubs to the starting position. If you want, you can also combine this exercise with a squat to warm up your legs as well.

I did this circuit about every other day, doing the circuit for two rounds at first. After successfully completing two consecutive circuits for two workouts in a row, I would add another round, eventually working up to six rounds. When you can consistently perform six rounds of this circuit, it’s time to build heavier clubs.

The first thing I noticed was a dull ache in my hands and forearms, even before my shoulders began to fatigue. The clubs were just plain hard to hold on to, so I decided to come up with a little forearm circuit as well to conclude my clubbell sessions with. This consists of front wrist lifts, rear wrist lifts, and finger crawls.

FRONT WRIST LIFTS: Keep your arms as straight as possible, and lift the clubs to at least parallel to the floor using only your wrists.

REAR WRIST LIFTS: These are the same as front wrist lifts, except you hold the clubs in a reverse grip. Your wrist has a greater range of motion working this way, so try to whack yourself in the triceps with the clubs on each rep. Make sure your arm is straight though this will isolate your forearms more.

FINGER CRAWLS: You know how when you get really fatigued even the most simple task can seem difficult? Welcome to finger crawls. Let the clubs hang at your sides, and walk your fingers up the club until you reach the tip. Keep the club perpendicular to the floor until you reach the tip, then let the club flip over and crawl back to the handle. Repeat this circuit until one of the exercises fails. Most likely, it will be the finger crawl that you bonk out on.

After about six weeks on these two circuits, I had added noticeable mass to each of my hands. Even better, I went from being able to do 15 consecutive reps on my Captain of Crush trainer gripper, to 26 consecutive reps. My grip is as strong as it’s ever been, and what’s better is that my shoulders have never been stronger or more stable. No USAWA lifts incorporate clubbells, but consider adding them to your routine to bump your hand strength up to the next level.

A Subtle Way to Train Your Grip

by Mark Haydock

Mark Haydock demonstrates a three-finger bar grip.

From my early days of training I have always applied this approach to the way I grip and load the bar, as you read on I am sure you will agree it is a subtle way to train your grip.

There are two sections to this approach, the first is simply the way the bar is gripped, the second part is loading the bar.

Gripping the bar

The idea behind this approach to grip work is to train your grip all the time, even when it is not a grip session! I will use the deadlift as the example exercise, however, the same approach can be applied to most floor pulls, lat pulldowns/rows, shrugs, etc.

Most of the grip work is actually done with your warm up and lighter poundages. The first set of deadlifts may be with an empty bar, simply grip the the bar with your index finger, the second set use index and fore fingers, next set is three fingers, next set is all four fingers – with an open hand, the bar is almost resting on your finger tips, you may be able to maintain this grip for a couple more warm up sets, depending how strong your grip is. Once you hit a poundage that you cannot hold just adjust to your normal hook or reverse grip. Over time try to tweak your warm up poundages a little, as you would with your heavy singles or 1 rep max.

Using a finger tip grip to load plates adds grip training to every workout.

Loading the bar

The subtle element here is to only use I hand to pick up the weight plates when you are loading the bar for your training. Use your right hand when loading the right side of the bar and your left hand when loading the left side of the bar. Rather than use a deadlift loading lever to lift the bar use your fee hand to lift the end of the bar, grip the bar just inside the collar. Depending how good your grip is you can use a 1, 2, 3, or 4 fingers to grip the bar, the same applies to loading the weight plate.

The one handed approach to loading the weight plate also includes carrying the weight from the storage tree to the bar! Don’t cheat by using two hands or rolling the plate. With the lighter plates, 1.25kg,2.5kg, 5kg try using 1 finger and 1 thumb, as you use heavier weights, 10kg, 15kg, 20kg, 25kg and even 50kg you may need to use 2 or 3 fingers and a thumb. If you are loading a 25kg plate and you simply can’t carry it one handed try a two handed pinch grip, it all helps!

The key thing to remember with this approach is that it is a long term project, massive grip strength doesn’t come over night. However, once you have a good grip it stays with you for the long run.

As a final testimony to my grip technique I can honestly say I have never missed a deadlift or clean due to poor grip, touch wood I have never had any real problems with my grip!

1 2 3 4