How to Evaluate a Lifting Bar

by Al Myers

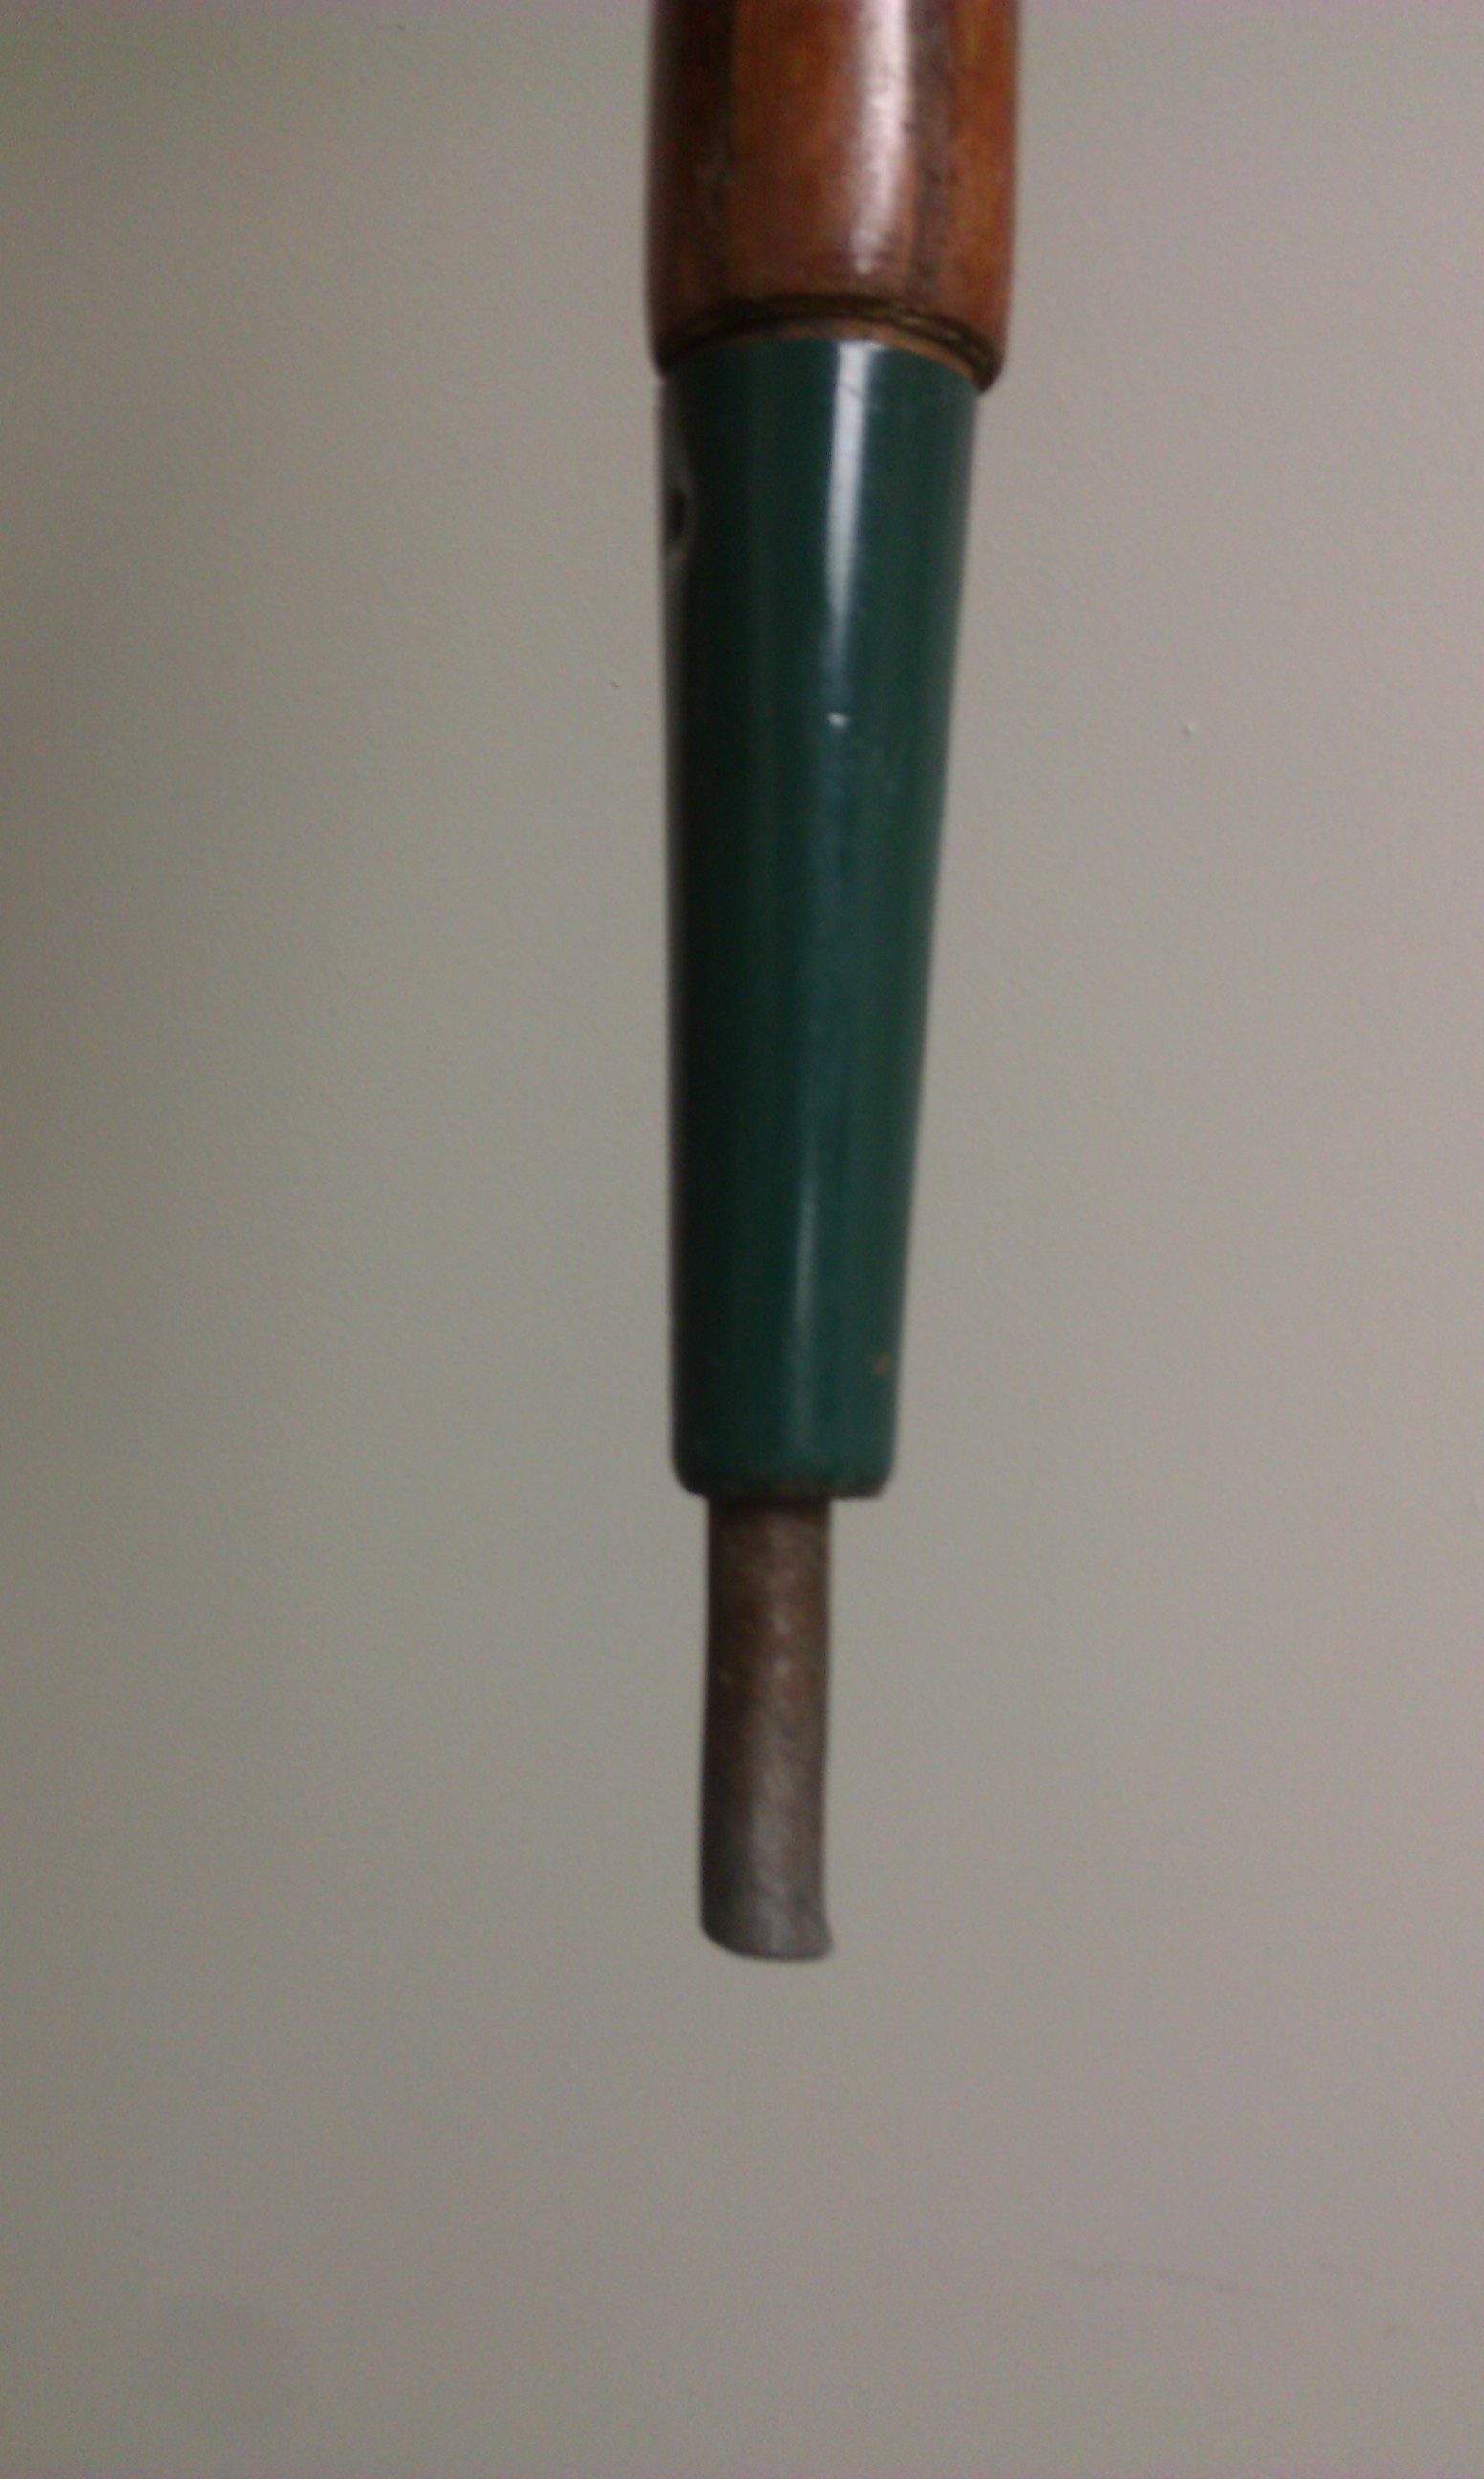
COURSE 101: BAR BENDING. Any thoughts on whether this bar returned to its original straightness?

Most that know me know that I have an passion with lifting bars.  I have over 50 bars in the Dino Gym – some excellent high quality bars, some just good bars, and others that are just “run of the mill” bars.  I don’t consider myself a collector either, as I use most of these bars in training from time to time.

Most lifters don’t take notice of the bar they are lifting on.  It’s just a piece of equipment that is necessary to lift the plates that are on it.  There’s nothing wrong with that thinking.  After all, the purpose of training is to get stronger and that can be done using anything – including a bad bar.  Having HIGH QUALITY BARS for training is not a big determining factor in getting stronger.  The bar is just a means to an end result.  I’m saying this because I want to make the point that having TOP TIER bars for training are not necessary, they are more just a luxury.

Now how does one evaluate what constitutes a quality bar?  There are “hundreds” of bars on the market – with each one having a “sales pitch” behind it. Bars are generally broken into 2 categories:

1. Economy Bars (or Junk Bars)

Economy bars are bars made with cheaper steel, poorer sleeve designs,  “looser” quality controls, and are sold at a lower price.  I refer to these as “junk bars”.  I have several of them by the way.  They usually don’t last long though in the Dino Gym, and get bent.  But they serve the purpose they are used for, namely exercises that put a bar at “high risk” for damage.  Like rack pulls, quick lifts in the rack, one arm lifts, etc.  I don’t want to jeopardize a good bar for these exercises as they are not designed for it.  I think of “junk bars” as disposable – use them till they bend, then throw them away. 

2.  Commercial Bars (or High Quality Bars)

This category should be named HIGH QUALITY bars instead, because it is very common for commercial gyms to have economy bars that are “passed off” as a commercial bar. Just put a shiny coat of chrome on a bar and it becomes a “good bar” in most gym-goers eyes.   There are many manufacturers of junk bars, but only a few make the top end bars.   Don’t always rely on this though, as most manufacturers of high quality bars also have a economy line as well.  There are probably over 20 junk bars to every 1 high quality bar sold. If you want to know the difference – just look at the price tag! Cheap bars are “cheap” and high quality bars cost more. You get what you pay for. 

High quality bars are made from higher tensile strength steel, sleeves are secured with roll pins or snap rings and contain either bearings or quality bushings, and have better knurling.  They are less apt to permanently bend when used. Often high quality bars are often made with a purpose in mind – Olympic weightlifting,  general powerlifting, deadlifting, squatting, etc.  They are designed for the exercise in question.  They often have a good  finish – having been zinc plated or a black oxide finish. They are not chrome plated!  Factors which influence steel properties are many – combination of alloys, heat treatment procedures, carbon content,  etc – I don’t want to get into that in this story as there’s too many other things to talk about.   I will keep it simple here and say high quality bars are made with better steel (and it’s not from China!!!).

From now on I’m just going to talk about high quality bars, as junk bars really don’t need evaluated.  Terming them “junk bars’ is evaluation enough. I like to break down the evaluation of a high quality bar into these 6 attributes:

1. Strength Rating
2.  Dimensions – bar diameter & lengths
3.  Sleeve Design
4. Knurling
5.  Finish
6.  Feel

1.  Strength Rating

This is often the NUMBER ONE thing that lifters look at when picking out a bar, and is really just a small factor in the total picture of a high quality bar. Years ago bar manufacturers would promote their product by giving  out a Static Rating, a number which was intended to mean the weight the bar could hold before it would bend permanently.  The first bar I bought was sold as a 700 lb. test bar.  I thought that sounded good – as I wasn’t squatting or deadlifting 700 pounds yet. Well, I bent it with doing explosive squats with 405 shortly after I bought it.  Something wasn’t adding up!  I then bought another cheap 700 lb. test bar and bent it as well.  It was at this time I was studying engineering at Kansas State University and was taking an engineering course, statics and dynamics, that I realized my errors in my thinking.  The Static Test in determining this POUND RATING was done entirely different than what I was doing with the bar in the squat rack.  In a Static Test the weight is loaded slowly on a bar as its supported, which allows the steel to “conform” to the bend, not under a sudden load as I was putting it under as I was ascending with my squats.  Its a Static Rating – not a Dynamic Rating.  Add in differences of where the bar is being supported during these Static Tests, and you can see this is a very poor rating system for evaluating bar strengths.  You would assume that the bar would be supported in the middle – but I question if that has always been the case in giving out test strength ratings. Moving the supports outwards would increase the Rating.   It wasn’t long before most bars went to a 1000 lb. rating, then onto 1500 lbs. and above.  After all, a higher Static Rating equated to a better bar and more sales (a marketing  fallacy that lifters have “fell for” for years in my opinion).

Now most high quality bars are sold with a PSI Rating of Tensile Strength  instead of a Static Rating (even though often you will see both disclosed on a bar).  PSI stands for pounds per square inch.   This rating is intended to tell you how much force can be applied to a bar before it breaks.  This means more to me than a Static Rating because at least you know the force was applied at a set point, ie the middle.  The testing involves putting a bar in a press and applying pressure to higher levels, until it snaps.    The limitation is still that it is a static force measurement, not a dynamic one as the “real world” bar would be experiencing.  But it is a better testing method for determining a bars strength rating than the Static Test.  But what lifter really wants to know what PSI it would take break a bar? No one wants to push a bar to THAT LIMIT!  I’m more interested in how much force (in PSI) a bar can take and still return to straightness.  That is termed Yield Strength – and a measurement that bar manufactures rarely reveal for “who knows why”.  Probably because it is a much lower number than Tensile Strength PSI and marketing doesn’t  want lifters to mistakenly compare “apples to oranges”, because they don’t know the difference. 

2.  Dimensions

A bar’s dimensions are very important in evaluating a bar, and these measurements vary significantly from bar to bar.  Like I said earlier, most high quality bars are designed with a specific lifting purpose in mind.  For example, Olympic weightlifting bars have very different dimensions than a deadlifting bar.  Even among Olympic WL bars, these measurements are different.  One WL bar may have a diameter of 28mm, and another one may be 29mm.  The length between collars may be slightly different as well.  The high quality deadlifting bars have a diameter of 27mm, while the high quality squat bars may be 32mm.  The marker lines on bars are different as well.  Powerlifting bars should have the 32 inch marker line for hand placement, which is NOT the handspacing  for Oly lifting.  WL bars should have the weightlifting marker lines instead. The standard length for most bars is 7 feet, but some bars are longer (i.e. deadlifting and squat bars).   Pay attention to these  dimensions when  picking out a high quality bar.  You want the bar  to serve the purpose you intended for it.

3.  Sleeve Design

Sleeve designs are different for every bar, but are very important in making  a bar a high quality bar.  For weightlifting, the sleeves should rotate very smoothly to accommodate snatching and clean and jerks.  I have taken apart many bars, and I always marvel at the insides of bar sleeves.  This is the part of the bar no one ever sees. I enjoy taking sleeves apart, and I think of it as doing an autopsy on a bar (which it usually is as the bar was previously “killed off” and bent, thus the reason  I was disassembling it).   There are many ways sleeves are designed to enhance rotation.  This is what I have seen, from worse to best:  1. metal on metal, 2. plastic bushings, 3.  nylon bushings/brass bushings, 4. ball bearings, & 5. needle bearings.  That pretty much sums it up.  Needle bearings have long been considered the “gold standard” – but I can tell you there are differences there as well.  I’ve taken apart several junk bars that I’m  surprised they rotate at all, as all they contain is a couple of worn cheap plastic bushings – yet are marketed as having bushings.  These type of bushings shouldn’t even be called bushings as they are so inferior to the quality bushings (like nylon and brass)  high quality bars have.  The diameter of the sleeves should always be checked.  Most high quality bars have sleeves that are very close to 2″ (sometimes as much as 1-31/32″).  If your plates are high quality as well (and in turn have close tolerances for the bar hole), the bar may not fit well in some plates.  The reason for this is that at the “top end” the bar is made for the plate being used, and BY THE SAME MANUFACTURER.  The Manufacturer makes the bar and plates as a set to “go together” with close tolerances, so the plates won’t be “sloppy” on the bar.  The way the sleeve is held onto the bar also tells alot about the quality.  You can quickly spot a low quality bar if the sleeve is held on by a bolt in the end.  This is the cheapest and easiest way to hold the sleeve on, but this bolt never seems to stay tight and requires constant attention so the sleeve doesn’t fall off!  This design allows lateral sleeve movement on the bar, which is undesirable.  It gets worse with wear. The “high end” bars use snap rings or roll pins.  A few use both.  The best design is using snap rings, as they are concealed and very rarely fail (yet I have seen it happen, but only when the bar was used in an unconventional matter). 

4.  Knurling

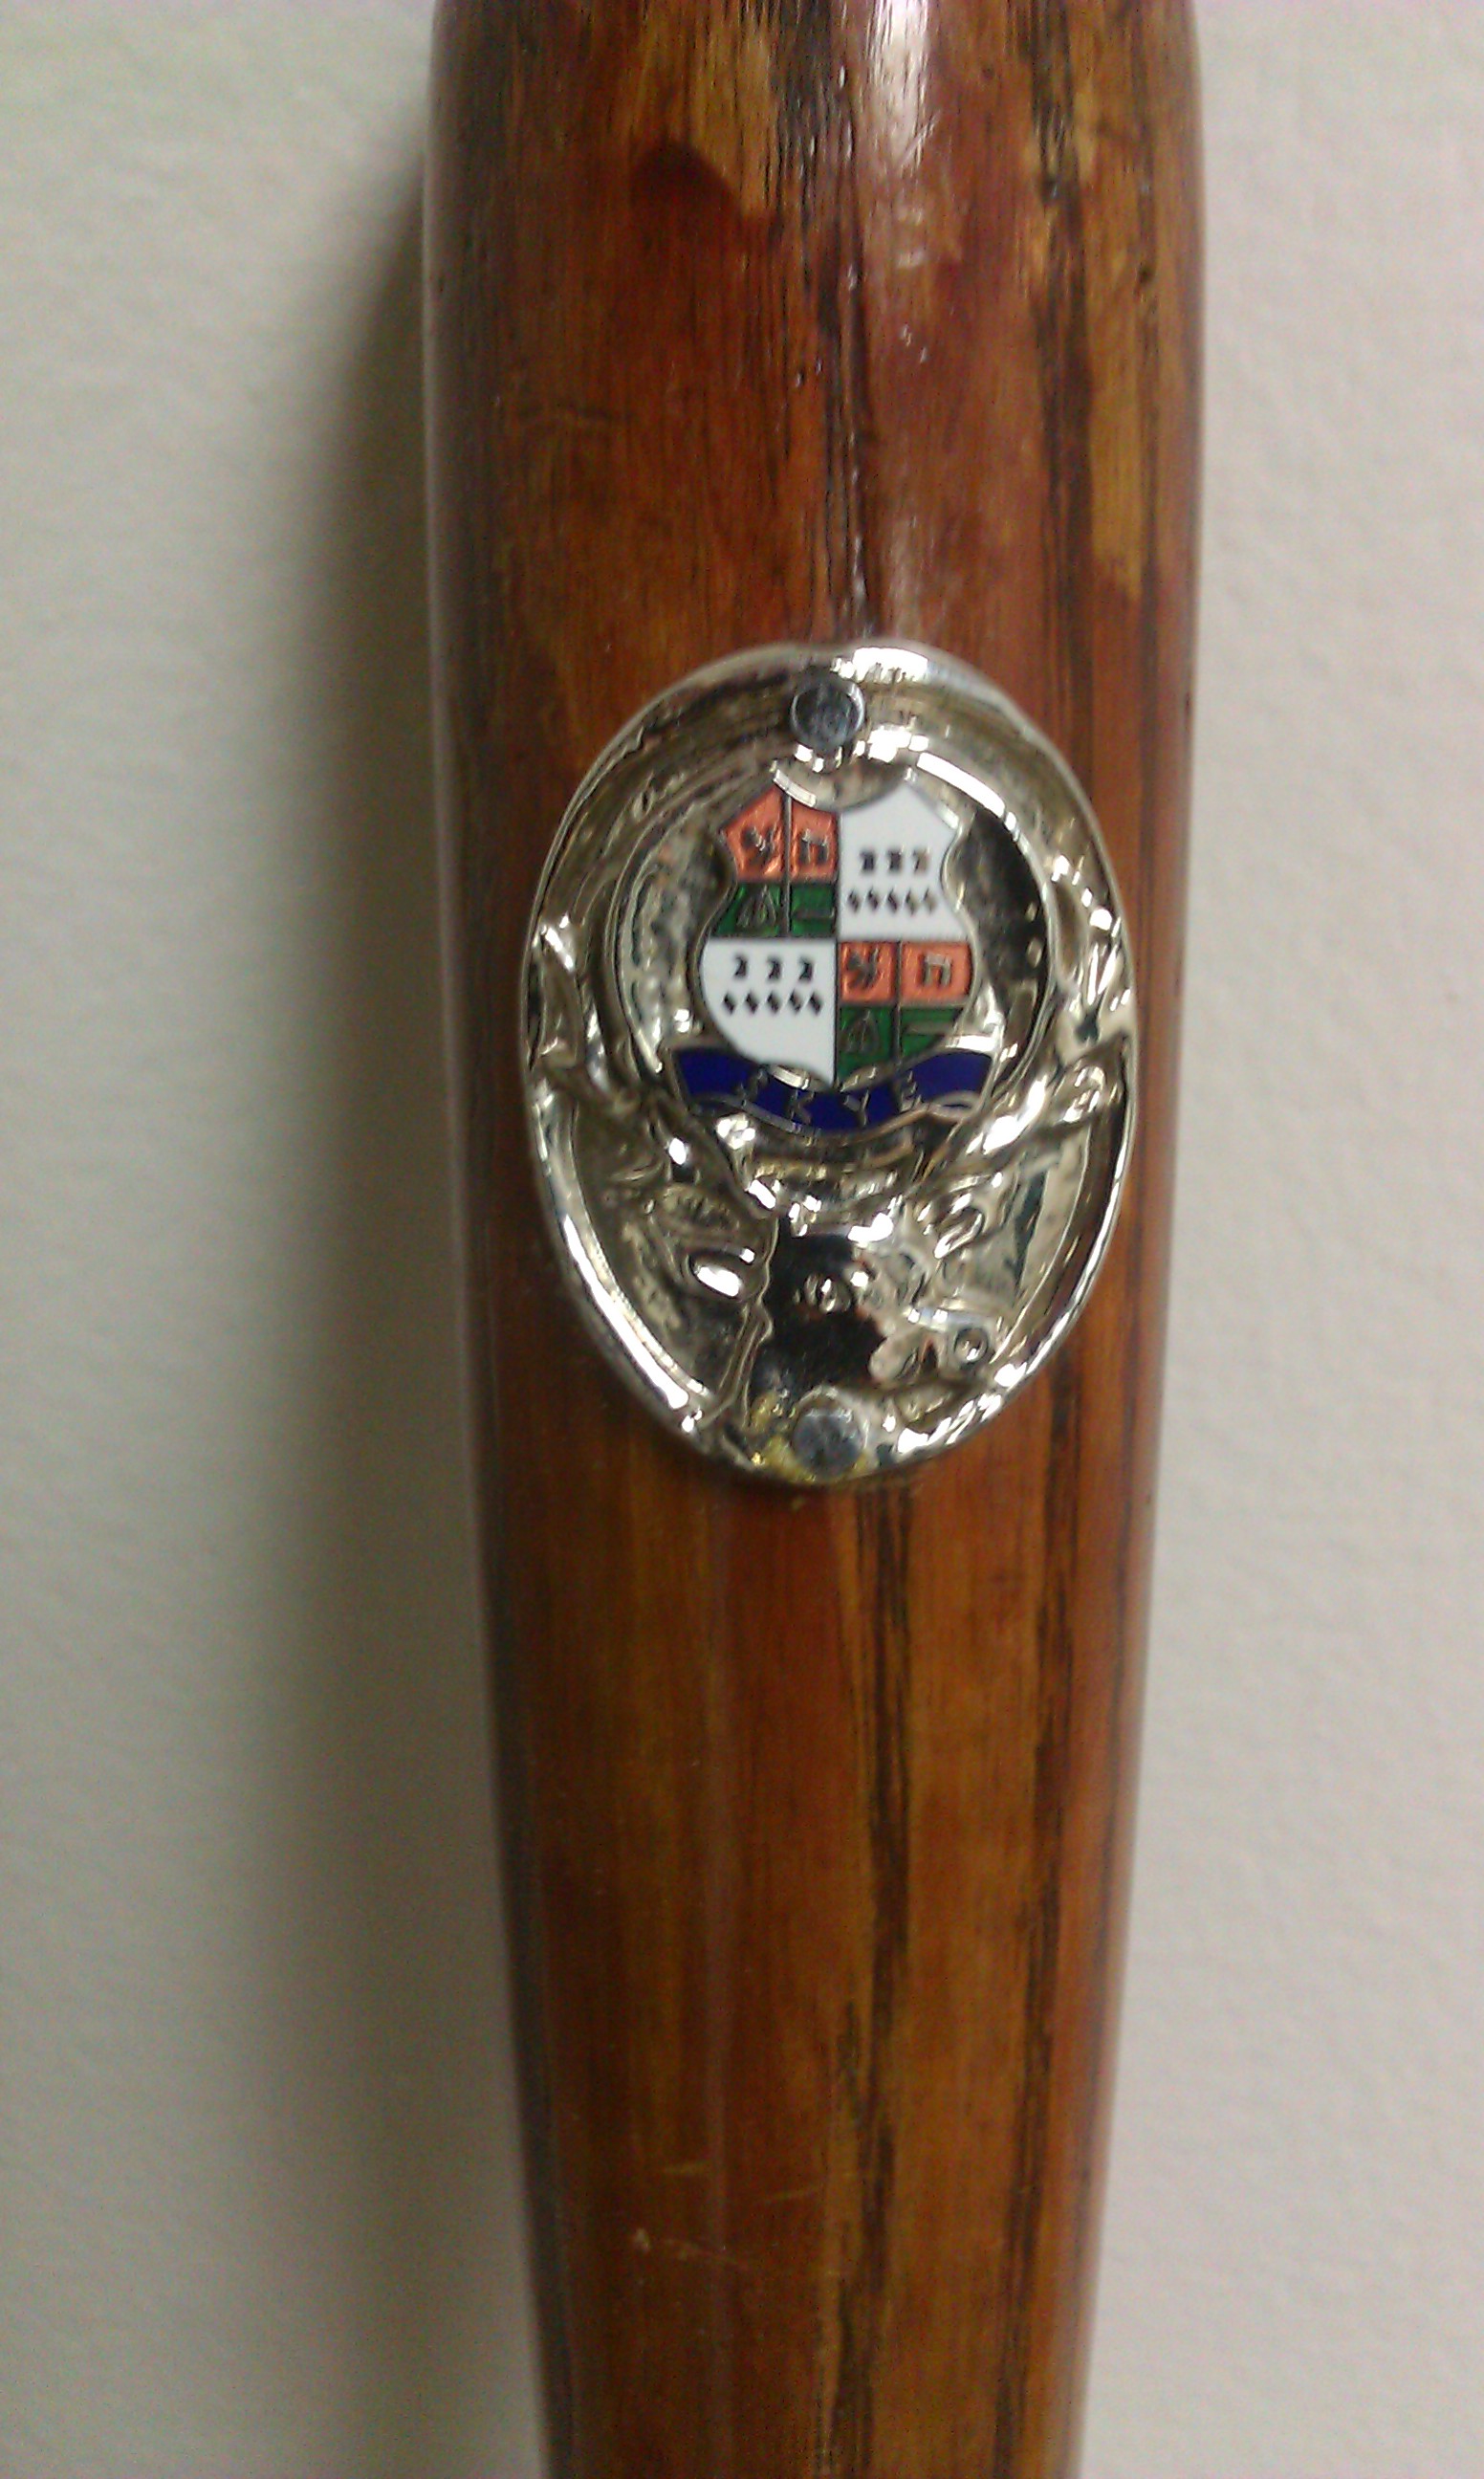
Every bar has its own unique knurling.  I think of knurling as the “fingerprint” of a bar.  It defines the bar and makes it different from other bars. Most people think knurling is cut into a bar, but that is false, as knurling is actually done by a pressing process.  There are many different “setups” for knurling, with each one giving a unique knurl.  Some are deeper, some wider, different patterns,etc.  The purpose of having knurling is to enhance your grip on the bar, without causing damage to your hand.  Different lifters have different preferences on the “aggressiveness” of the knurl.  The spacing of the knurling is different as well.  Some bars have center knurling, while others don’t . 

5.  Finish

The top choices for a bar finish are these:  1. none or blued, 2.  Chrome plated, 3. Zinc plated, and  4. Black oxide. If you are fortunate to have a stainless steel bar you have a bar that DOES NOT need a finish.  The stainless steel stays looking good always!  I have one Stainless Steel Bar, that I have had for over 5 years, and it has NO rust or corrosion on it.  It looks as good now as when I bought it.  However, stainless steel is very expensive (3 to 5 times that of other steel), and is difficult to machine which makes these bars prohibitively expensive.  That’s why you don’t see them much.  Chrome plating is the standard of economy bars because it’s the lowest cost way of keeping a bar shiny.  That’s what you see on bars in commercial gyms, as they can be wiped clean after usage and remain with a glossy finish.  I actually hate chrome plated bars – they are harder to grip, the chrome often starts to flake off after heavy use, and the chrome doesn’t hold chalk well.  Zinc plating has become more common recently.  At first glance you might think a Zinc plated bar was chromed, but you can tell the difference if you see both of them side by side.  Black oxide is also a very common bar finish. I really like this finish as these bars hold chalk well and the knurling is not coated with chrome or zinc and has a better feel.  Now there are also a few high quality bars that have no finish (or maybe just a bluing).  You can spot these in the gym because they are rusted and look like crap.  But that doesn’t bother me getting a little rust on my hands if the bar is a great bar otherwise!  I have one of these in the gym (I won’t name it!) that is one of my favorite bars.  You have to remember that a finish is put on a bar for only one reason – to make it look better.  It provides no benefit to the functionality or performance of the bar, and I’ve talked to several lifters that prefer the feel of the “natural steel” over that of a bar with a finish.  

6.  Feel

Now this is the intrinsic category.  No measurements or processing procedures here to make an evaluation.  It comes down to answering this question,”how does the bar feel in your hands when you lift on it?”.  Do you like it?  Or does it just don’t feel right?  A bar may look like the “bar of your dreams”, but when you load it up to a heavy weight and perform a lift, does it feel as good as it looks?  I’ve been disappointed before with a new bar.  There are several factors that make bars feel different.  The biggest one is “bar deflection”.  This is the bend that occurs when the bar is moved or accelerated during a lift.  It is purely a result of the steel properties of the bar, and is different for every bar.  Some bars deflect more, while others are stiffer when lifting on.  The bar diameter and ratings may tell you a little on this, but it comes down to the steel used.  I say this because I have bars that have the same diameters and ratings, yet deflect (or bend) differently when lifted on.  As well, each lifter has their own preference.  The same goes for “bar oscillation”.  This is sometimes referred to as whip.  It occurs when the bar is deflected during acceleration of a lift, and then the movement of the bar is ceased. The oscillation will continue upwards.  Some bars will deflect, then return to position quicker than others and have less oscillation.  Others will tend to oscillate, which can be viewed as favorable or not, depending on the lifter and how they can adjust to it.  Sometimes it can be used to the lifters advantage, as often seen in the clean when rebounding from the catch to the squat.  Sometimes “the feel” is purely psychological with a bar.   I have a couple of bars that are my “go to” bars when I want to get a big lift in for the workout.  I’ve had success with them in the past – and this confidence is propagated into future success.  The question is answered – the bar just feels good in my hands when I lift on it!

I hope all this helps in understanding how to evaluate a lifting bar.  I apologize for getting so long with all this – which I guess goes to show that I may be beyond passionate on this subject and bordering on obsessive/compulsive.  I’m going to cover a few of the bars in the Dino Gym over the next couple of months in USAWA Daily News stories.  Several of the Dino Gym bars have interesting stories that go with them. and I want to share this with you.

And to answer the question in BAR BENDING:101 – that poor bar was never straight again!

GONE FISHIN’ – THE HARD WAY

BY DAVE GLASGOW

(WEBMASTER NOTE: Recently I issued a writing contest, in which I challenged lifters to write about an unusual training implement/device that they use in their training. The stories were submitted and judged, and I’m going to initially publish the top three stories in the USAWA Daily News as they were the contest award winners. Thank you to everyone who submitted stories for this competition, as they were all excellent. Here’s story RANKED NUMBER ONE:)

THIS IS MY DAD, DOING WHAT I REMEMBER HIM FOR, WORKING.

“DAD!!  WE GOT A FISHIN’ JOB!”, I SAID, OVER THE PAY PHONE.  “CHRIST!!”  WHAT HAPPENED THIS TIME???”, WAS HIS REPLY.  HE KNEW, FROM PREVIOUS EXPERIENCE,  THAT A CALL FROM ME AT SEVEN IN THE EVENING WAS NEVER GOOD NEWS.   AS I EXPLAINED WHAT HAD OCCURRED, I COULD HEAR MUMBLED, MUFFLED WORDS AND CURSES I HAD NOT PREVIOUSLY BEEN EXPOSED TO, COMING FROM HIS END OF THE RECEIVER! BEING IN OUR OCCUPATION, THAT WAS SAYING SOMETHING!

FOR THOSE OF YOU WHO DON’T KNOW ME, I WAS BORNE, BAPTISED AND RAISED IN THE ‘OIL PATCH’(DAMN PROUD OF IT!).  I HAVE SPOKEN OF IT PREVIOUSLY IN A COUPLE OF ARTICLES I WROTE ABOUT WHAT WE DID WITH OUR DRILLING BUSINESS.  THIS WAS DIRTY, HARD, HEAVY LABOR, IN ALL SORTS OF WEATHER.  THE DRILLING ASPECT OF THE JOB WAS THE ‘EASY’ PART DUE TO THE FACT THAT, IF ALL WENT WELL, THERE WAS A LOT OF ‘ASS TIME’.  THIS PARTICULAR OCCASION, HOWEVER, WAS NOT GOING TO BE ONE OF THOSE TIMES.

THE “FISHIN’ JOB” I REFERRED TO EARLIER IS IN REFERENCE TO OUR STRING OF TOOLS BEING LOST AT THE BOTTOM OF THE HOLE, ABOUT 200’ BELOW THE SURFACE OF THE EARTH.  THE REASON FOR THIS IS THAT THE ‘ROPE SOCKET’ THAT HELD THE CABLE TO THE REST OF THE ‘TOOLS’ HAD, UNFORTUNATELY, TWISTED OFF (COME UNSCREWED). WHEN THIS EVENT HAPPENS, IT RUINS THE THREADS THAT ARE ON THE INSIDE OF THE ‘ROPE SOCKET’, RENDERING IT USELESS.  WE HAD SEVERAL OTHERS AND THIS PARTICULAR ONE WAS CAST ASIDE UNTIL IT COULD BE RETHREADED AND PUT BACK INTO SERVICE.

FURTHER, TO RETRIEVE THE TOOLS, YOU, LITERALLY, HAD TO ‘FISH’ THEM OUT WITH A DEVICE THAT TOOK A FRICTION HOLD TO THE TOP OF THE TOOLS AND, IF THE DRILLING GODS WERE IN A GOOD  MOOD, PRESTO!, YOU WERE BACK IN BUSINESS. THE FACT THAT THIS HAPPENED ON THIS PARTICULAR DAY WAS ESPECIALLY PROBLEMATIC AS WE WERE BEING PRESSURED TO FINISH THE WELL, IN ORDER FOR THE ‘BIG RIG’ TO COME IN AND GO TO THE TOTAL DEPTH.  THIS WOULD ONLY SET US BACK A WHOLE DAY, IF WE WERE LUCKY.

WELL, THE GODS MUST HAVE BEEN SNOOZING BECAUSE WE SNEAKED BY THEM AND GOT OUR STRING OF TOOLS ON THE FIRST RUN!!

UNFORTUNATELY FOR US, THE OIL PATCH PETERED OUT IN THE EARLY ‘80s AND I WAS LOOKING FOR WORK.  THE ROPE SOCKET WAS NEVER REPAIRED AND SAT WITH THE OTHER, RUSTING TOOLS AND RELICS OF A DAY GONE BY.  I TOOK A COURSE TO A COMPLETELY DIFFERENT DIRECTION, CAREER WISE, AND LEFT THE OIL PATCH FAR BEHIND.

JUMP AHEAD 20 YEARS.  MY FAMILY AND I EXPERIENCED A NUMBER OF ‘CHALLENGES’ IN THE FORM OF ILLNESS, DEATH AND HARDSHIP.  THIS ALL CAME ABOUT IN THE PERIOD OF ABOUT EIGHTEEN MONTHS.  CONSEQUENTLY, I MUST CONFESS, I HAD HAD ABOUT ALL I COULD TAKE.

THE ROPE SOCKET I USE FOR MY 'ALTERNATE' TRAINING.

SIGNIFICANTLY FOR THIS STORY, FOR SOME REASON, THROUGH THE YEARS, I REMEMBERED THAT ROPE SOCKET  AND HOW I ALWAYS THOUGHT IT WOULD BE A GOOD WAY TO DO SOME ‘ALTERNATE’ TRAINING. SO, THE NIGHT PRIOR TO A HUGE SURGICAL PROCEDURE THAT I WAS TO HAVE,  I FIGURED THIS WAS AS GOOD A TIME AS ANY TO FIND OUT.

 I TOOK THE SHORT DRIVE TO THE FAMILY FARM (LEDAIG, TRUELY, MY ‘SAFE HAVEN/HARBOUR’), FOUND THAT ROPE SOCKET AND PROCEDED TO HAVE ONE, ‘LAST WORKOUT’ BEFORE BEING INCAPACITATED FOR, WHAT TURNED OUT TO BE, A NUMBER OF WEEKS.  THE FACT THAT I JUST BURIED MY BELOVED DAD TWO DAYS BEFORE JUST ADDED TO THE INTENSITY AND EMOTION.  YOU SEE, MY DAD AND I ALWAYS SHARED A LOVE OF THE OIL PATCH(NOT TO MENTION, EACH OTHER) AND I SAW THIS AS A WAY TO ‘CONNECT’ WITH HIM ONE LAST TIME AND PHYSICALLY READY MYSELF FOR WHATEVER WAS TO COME.

NOW, FOLKS, THE ROPE SOCKET IN QUESTION, WEIGHTS, I WOULD GUESS 175 POUNDS.  I HAVE NEVER WEIGHTED IT, AND, TO ME, IT IS NOT IMPORTANT.  IT’S HEAVY FOR ME AND THAT IS ALL THAT MATTERS.

AS I HAVE TOLD MOST OF YOU AT ONE TIME OR ANOTHER, I DO NOT CONSIDER MYSELF THAT STRONG OF PERSON.  I CERTAINLY DO NOT DO WELL AT CLEANING THE WEIGHT.  HOWEVER, THAT EVENING, I CLEANED AND PRESSED THAT ROPE SOCKET AT LEAST 30 TIMES IN AN HOUR.  EVERYTIME I WOULD START TO GET TIRED, I JUST HAD TO THINK OF DAD, THE PROCEDURE TO COME, WHAT OUR FAMILY WAS GOING THRU AS A WHOLE AND I WOULD BE INVIGORATED FOR ONE MORE SET.  FINALLY, I WAS TOTALLY EXHAUSTED WHEN I FINALLY DECIDED I HAD HAD ENOUGH.  I WAS SPENT, EMOTIONALLY, AS WELL AS PHYSICALLY.  HOWEVER, MENTALLY, I WAS READY FOR THE CHALLENGES TO COME IN THE NEXT DAYS!

IN THE END, ALL TURNED OUT WELL. IT IS SAID THAT TOUGH TIMES DON’T LAST, BUT TOUGH PEOPLE DO!  I AM PAINFULLY AWARE I AM NOT THE TOUGHEST GUY AROUND; HOWEVER, I CAN NOT SAY THAT FOR MY WIFE AND KIDS, AS THEY WOULD RANK RIGHT AMONG THE TOUGHEST.  HOWEVER, I WEATHERED THE STORM; OUR FAMILY AND FRIENDS CLOSED RANKS AROUND US AND WE CAME OUT THE OTHER END, WHOLE.

REGARDLESS, I STILL REMEMBER THAT “PRE-OP WORKOUT”, ON A HOT, STILL SUMMER EVENING. I THINK OF IT OFTEN.  IT WILL GO DOWN AS, PROBABLY, THE MOST MEMORABLE AND PRODUCTIVE WORKOUT OF MY LIFE! 

FINALLY, I WILL SMILE AND REMEMBER, LOVINGLY,  THE MEMORY OF THOSE MUMBLED, MUFFLED WORDS AND CURSES OF MY DAD, WHO, I AM SURE, WAS WATCHING OVER ME (AND MY FAMILY) ALL THE TIME.

CHINNING ADDICTION

 By Dan Wagman, PhD, CSCS

Publisher, Journal of Pure Power

Consultant, Body Intellect

(WEBMASTER NOTE: Recently I issued a writing contest, in which I challenged lifters to write about an unusual training implement/device that they use in their training. The stories were submitted and judged, and I’m going to initially publish the top three stories in the USAWA Daily News as they were the contest award winners. Thank you to everyone who submitted stories for this competition, as they were all excellent. Here’s story RANKED NUMBER TWO:)

Dan Wagman performing a One Arm Chin Up on his fingerboard. The top picture is a "closeup" of the fingerboard.

My oddest training device is my fingerboard; it comes out of the realm of bouldering. In the rock-climbing world this strength-training device is rather common as climbers use it to strengthen their fingers and pull-up prowess. I use it in my Dungeon exclusively for weighted pull-ups and one-armed pull-ups.

What’s different with a fingerboard compared to a chinning bar is that you have different gripping options. You can use a narrow or shoulder-width grip, but you can also change the amount of grip your hands actually have. So you can use a grip that’s similar to what you’d have on a bar or you can pull while palming the fingerboard, meaning that your fingers aren’t wrapped around anything, but instead are flat on a slightly conical surface that extends from your fingertips down to your palm. That’s how I warm up my pull-ups and I have found it to increase my grip strength. Then there are slots and holes of different sizes so that you can pull with the first link of any number of fingers you’d like to use. And of course you also have the option of doing one-armed pull-ups with any combination of fingers or hand-hold method you’d like. All of this turns pull-ups into an entirely different dimension, quite different than what the usual weight lifter would do. But once I go from my fingerboard to a regular chinning bar, I’m moving a lot more weight.

My Historical Context

Recently Dan Wagman performed a Pullup with 120 lbs. extra weight at the Dino Gym Record Day. The USAWA rules of the Pull Up require the point of the chin to be above the bar and held for a down command. This is the BEST Pullup listed in the USAWA Record List, so it's obvious Dan's training approaches have been working! (photo and caption courtesy of webmaster).

Although I don’t know much about the history of fingerboards in the climbing world, I can tell you that it’s nearly non-existent in weight lifting gyms. But here’s how this training came about for me. When I started lifting as a teenager, I was consumed by trying to become as strong as possible. One of the guys in the gym would always do pull-ups. He also added weight around his waist with some silly looking ropes. But he also pulled himself over the bar with ONE ARM, and could do that with both arms for reps. That blew me away and after watching him for some weeks I built up the courage to approach him.

Turns out he was training for his main passion — bouldering. When you’re on a rock-face, it can be very important to be able to pull yourself up to the next hold with one arm. And so those silly ropes he used to hold additional weight, well, they were two different types of climbing ropes with specialty knots, one around his waist and the other attached via a carabiner for additional weight. The next time I saw him he brought ropes and a carabiner to the gym and made me my own chinning rig. Now that’s the best present I ever got and I still use it all the time.

Progressing Difficulty

So in my training back then I continued to pile on the weight for my pull-ups. But when I tried a one-armed pull-up, I couldn’t even bend my elbow an inch — literally. So I reduced the difficulty by doing one-armed pull-downs. Once I could do my body weight, I increased the difficulty by pulling on a chinning bar instead. But it still took some time until I was able to pull myself to the bar with one arm. For the last 15 years or so, however, I use a bouldering fingerboard for all my pull-ups. Why? It’s just another method to increase the difficulty of pull-ups. And I suppose I don’t have to explain to a bunch of all-round lifters why that’s a good thing, do I?

My passion for lifting weights and one-armed pull-ups lives on as strong as ever. I was able to send my friend a picture of me doing one-armed chins weighing 190 pounds with a 35-pound plate around my waist as it appeared in Milo. He was proud to know that he was the one who started this insanity in me. But of course he’s insane, too; how many guys do you know who in their late 50’s do one-armed pull-ups for reps with each arm?

Me and my walking stick

by Thom Van Vleck

(WEBMASTER NOTE: Recently I issued a writing contest, in which I challenged lifters to write about an unusual training implement/device that they use in their training. The stories were submitted and judged, and I’m going to initially publish the top three stories in the USAWA Daily News as they were the contest award winners. Thank you to everyone who submitted stories for this competition, as they were all excellent.  Here’s story NUMBER THREE:)

Me with my walking stick.

Recently Al Myers put out the challenge for another writing contest.  This time around the challenge was to write a story on “an unusual training implement/device that you use in your gym for training”.  First of all, I’m pretty excited about this because I am hoping many of our members get involved and I will see some new things to possibly try out.  When you have been lifting as long as some of us have, you kind of need something new every once in awhile to spark that fire!

Second of all, I have a lot of unusual stuff in my gym!  Every so often I find something or make something that can be that “something new” to get me going.  Often, I use it for awhile and more often than not, it ends up stored away for long periods of time.  So I sat in my gym, trying to think of what I wanted to write about.  Then it hit me.

I would write about the one piece of equipment, other than a barbell, that I have used the most in my gym.  While not a completely unique piece of equipment, it is practical, can build strength, and I would think could benefit any gym.  But that’s not why I wanted to write about it.  It’s the story behind it and what it means to me.

Many of you know that when I was around 10 years old I was in a terrible accident.  Before that time I could run like nobodies business.  I was by far the best athlete in my school and once, while in the 4th grade, got beat up by a 6th grader after I showed him up in gym class.  Then it was all taken away in an instant.  Both legs were broken, my hip, both arms, a severe concussion, internal injuries…..let’s just say it was a bad deal.  My parents were initially told I would be brain damaged (I can see those who know me nodding their head and thinking “that explains a lot”!), crippled (almost lost my right leg), and even possibly blind.  I spent 3 plus months flat on my back with no guarantee I would ever make it out of that bed to anything more than a wheelchair.

The "tip" of the walking stick....painted green for my favorite color. That metal tip has saved me from some nasty falls!

I cannot explain to you what it is like to wake up in a bed two weeks removed from your last memory with that memory being a sunshine filled day having fun with your friends with your body busted up and on so many pain medications you keep seeing things that aren’t there.

As I lay there and my situation became more and more known to me, I sunk into a deep depression.  My Mom and Dad were having problems and this only led to bigger problems.  My father dealt with it by going to work driving his truck and staying away while my mother stayed by my side 24/7.  While I appreciated my mother’s dedication, she bought into the possible negative outcomes and this made it tough for me to stay positive.  I know realize we both share a family “curse” of depression and it was no fault of hers.  I did have the support of my extended family and many would often come visit.

One person in particular came every chance he got.  Of course, this was between his two jobs at the shoe factory and evening janitor work.  That person was my grandfather Dalton Jackson.  He and I were fast friends before this accident and this only brought us closer together.   We often went on hikes in the woods, hunted arrowheads, and in general had fun in the outdoors.  Dalton, or “Pop” as I called him, showed up shortly after I first came to with an old “Outdoors” book.  It was a book on how to camp, canoe, hunt, fish….a basic survival book.  This was 1974 and this book was from the 50’s.  It had some photos and drawings made by the author.  Kind of what he had learned in his lifetime outdoors.

In particular, there was a story on how to make a walking stick.  It was very simple.  You would take an old hoe, cut then blade off leaving a short metal “spike” on the end.  Pop pointed it out and promised that when I got out, we would make one.  It was that optimism that I hung on to.  Pop said I would need a walking stick which implied I would be walking again some day….and I believed him.

The top of the walking stick with the badge that represents the Isle of Skye in Scotland. This badge was with me when I climbed two of the tallest mountains in Scotland.

Shortly after I got home, I was in a wheel chair for some time.  At one point, we went out to the barn and he took a hoe he used in his own garden and we took a hacksaw and cut the blade off.  We then took some sandpaper to the wooden handle and sanded it smooth and then applied a little stain and some Shellac.  Pop used Shellac often.  Don’t see it much any more, but if you’ve ever heard the expression “he got shellacked” that’s where it comes from.  It put a nice, shiny, coat to seal it against water.

Obviously, I couldn’t use it right away.  But sitting in a wheel chair before cable television, computers, and the fact we didn’t even have a phone for awhile……you get pretty bored.  I would take that walking stick and find all kinds of things to do with it.  My grandfather showed me some exercises that I now realize were related to the “Weaver” stick.  I would lever that thing in all different directions chocking up on it as needed.  I would also pretend to do bench presses, overheads….you name it.

Then, as I started to be able to walk and I started lifting as a way to gain strength that stick found it’s way into my lifting.  I would use it to loosen up my shoulders.  I also couldn’t even squat my body weight so I initially lowered myself to a chair and use my arms to assist in my squats.  Then, when I could do a squat without help, the first thing I remember squatting was that walking stick across my shoulders.

Yes, I even hiked with it.  Pop and I retraced the railroad bed of the CB&Q that my Great Grandfather helped build in the 1800’s from Kirksville to Trenton.  It was about 60 miles that we did a few miles at a time.  I later took that walking stick and hiked in the Rockies, Yellowstone, Glacier National Park, the Appalachians, the Ozarks…..countless treks and hikes. I have even taken it in parades.  I couldn’t take it to Scotland so I bought a hiking badge and have fixed the badge to a stick in Scotland and then taken the badge and put it on my old “hiking stick”.

Most any time I go to my gym to loosen my shoulders I will grab that stick.  I will also pick it up when I work grip and lever it in all kinds of positions.  I am pretty decent at levering a sledge hammer and I honestly believe using this stick over the years is why.  I also try to walk a mile every day around my property and that stick makes the walk with me most every time.

I would have to say that most people would find it pretty plain.  But not me.  That stick has power.  It made me believe and it reminds me of “Pop” every time I look at it.  I know he sacrificed a perfectly good hoe for me to have that stick because he understood what it meant.  I have always believed there are no “secret” routines….only the one’s that you truly believe in will be the one’s that work.  My walking stick is symbolic of that!

Now, you will have to excuse me….I have a walk to go on!

World Record List

by Al Myers

Chris Bass (left) working "the table" at the 2012 IAWA World Championships along with Steve Gardner (right).

Chris Bass of Grimsby, England is the Official IAWA World Record List Registrar.  Chris has held this position for several years now, having taking it over from Frank Allen. Chris operates an All Round Weightlifting Club, the Haven Gymnasium, and is an active member of IAWA.  Chris does an EXCELLENT JOB of maintaining this World Record  List, which is an overwhelming task.  He also maintains the IAWA(UK) Record List to add to his workload of record keeping.  Lately, Chris has been keeping an updated IAWA World Record List available for downloading/viewing on his club’s website. I know he is updating it frequently as he keeps me informed of any recent World Records performed in the USAWA.

LINK TO IAWA WORLD RECORD LIST –  http://www.havengym.org.uk/

From now on, this link to the IAWA World Record List will be easily available on the USAWA website.  It is now included under the section “RECORD LIST”, located on the top line of the homepage, third item from the left (by jim). The World Record List is located under the information for the USAWA Record List.  Simply “click” on the link to the list there and the IAWA World Record List will always be “at your fingertips!”.

Numerous IAWA World Records were set at the past USAWA Grip Championships.  For those interested, this is the record sheet that Chris sent to me following the meet in which he marks the World Records set – USAWA_2013 Grip Championships

We are very fortunate to have Chris performing this important job in IAWA.  He takes this role very serious.  He made the trip from England to the World Championships in Salina, Kansas just to be the meets scorekeeper/recorder.  He often updates the World Record List at meets when he has “downtime” in his scoring responsibilities.  That’s the way to keep the list current!! Chris is always at the big IAWA events which demonstrates his commitment to the position of IAWA Registrar, and his devotion to IAWA.  We owe him a BIG THANK YOU!!!

1 270 271 272 273 274 484